

Snow Skin Mooncakes (冰皮月饼)

Picture Credit to the Original Owner
No-bake snow skin mooncakes offer a simple, tasty alternative to traditional mooncakes with a soft, chewy skin and creamy custard filling. Follow my guide to make them!
Mid-Autumn Festival (Zhōng Qiū Jié/中秋节), celebrates the full moon. Mooncakes (Yuè Bǐng, 月饼), named after their moon shape, are a must-eat tradition worldwide, varying in crusts and fillings across China. The 2 types the are most loved traditional Cantonese mooncakes with salted egg yolk and easier, modern snow skin mooncakes.
What is snow skin mooncake ( Aka Snowy MoonCake )
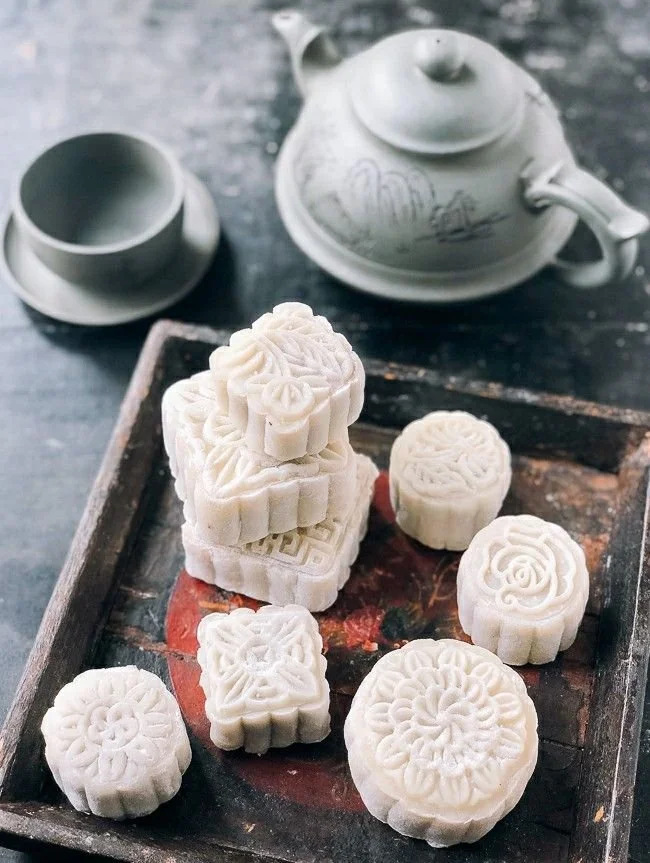
Known as Bīng Pí Yuè Bǐng/冰皮 in Chinese, snow skin mooncake is believed to have originated in Hong Kong (although some argue that it’s from Singapore). It has become increasingly popular in Chinese bakeries, as well as in family kitchens, thanks to its diverse appearance and simple cooking procedure.
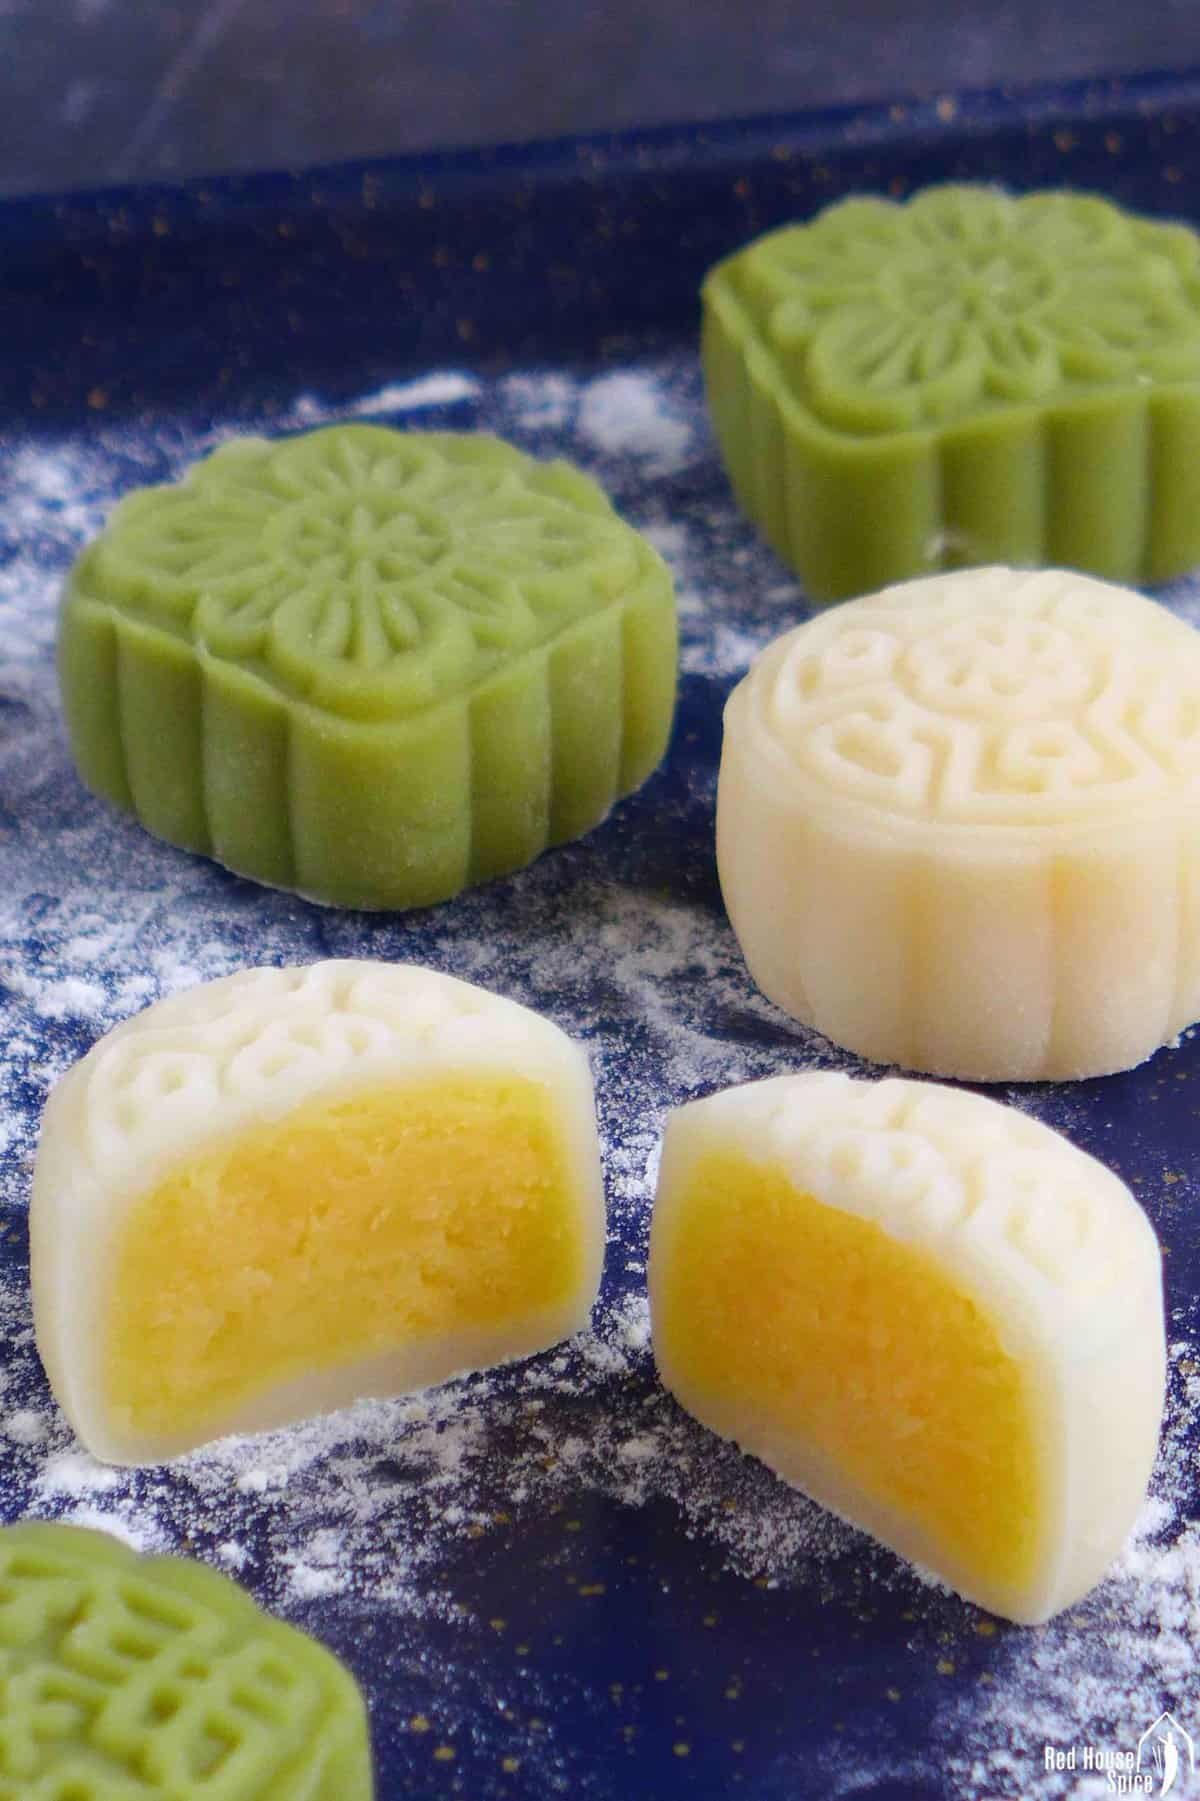
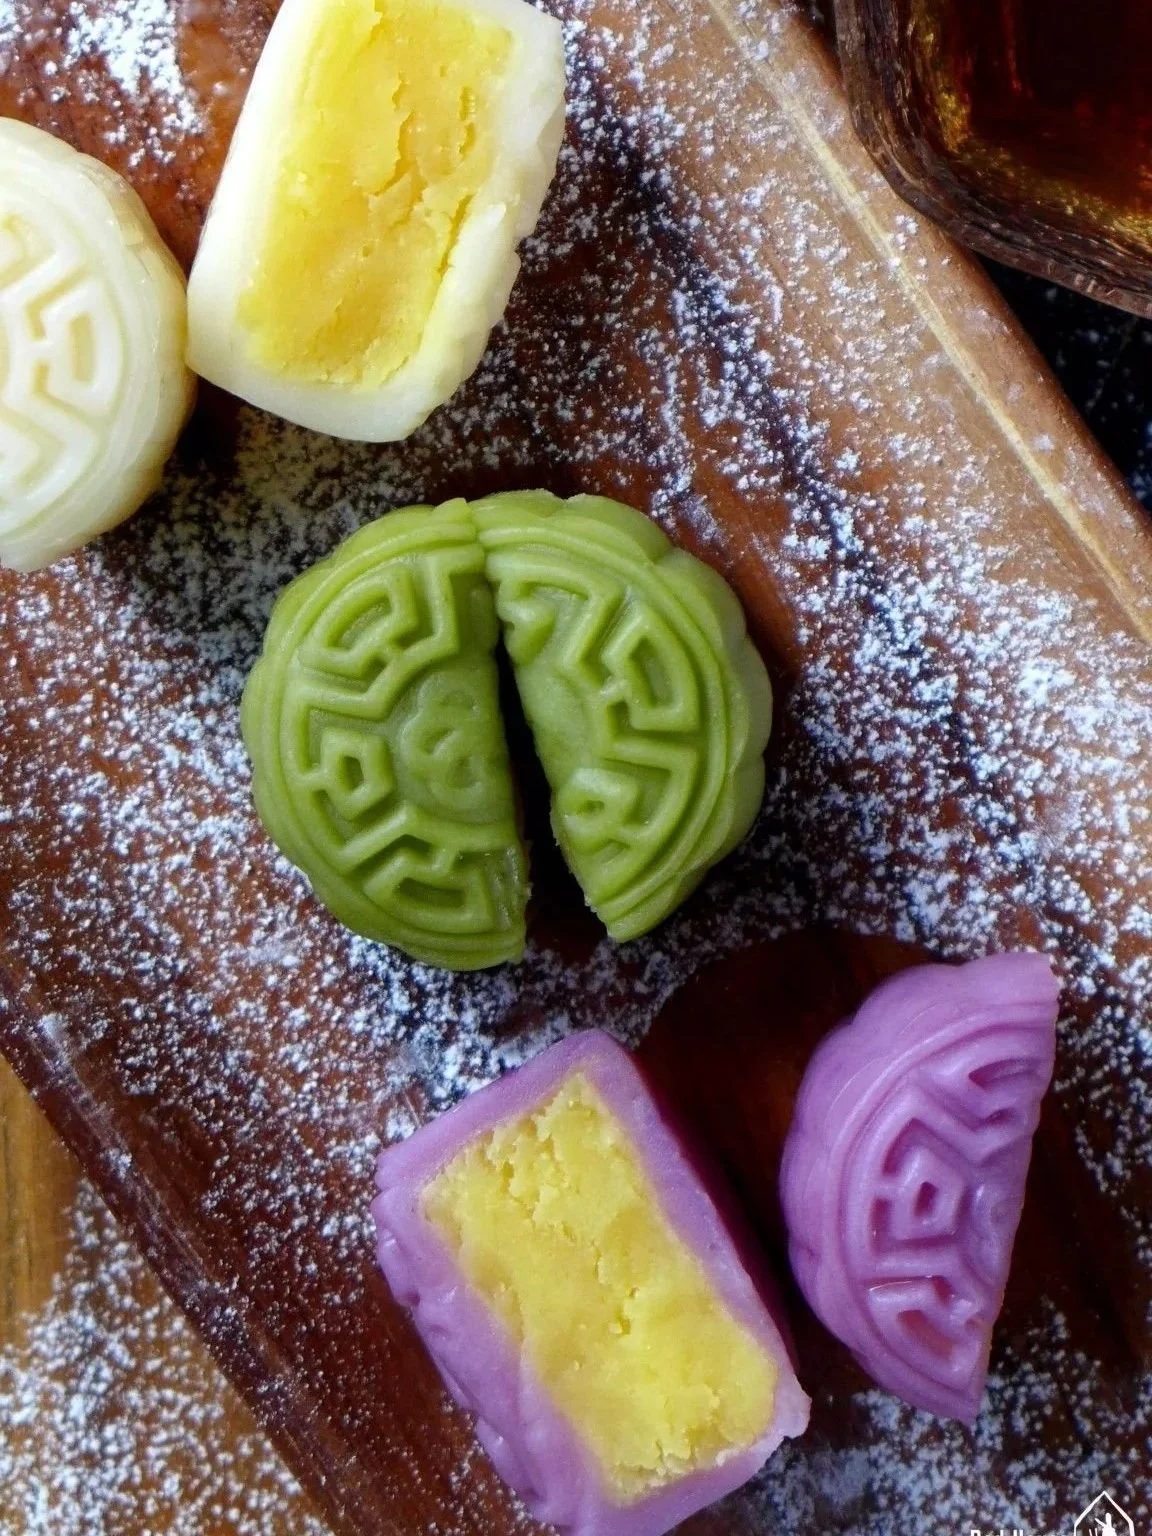
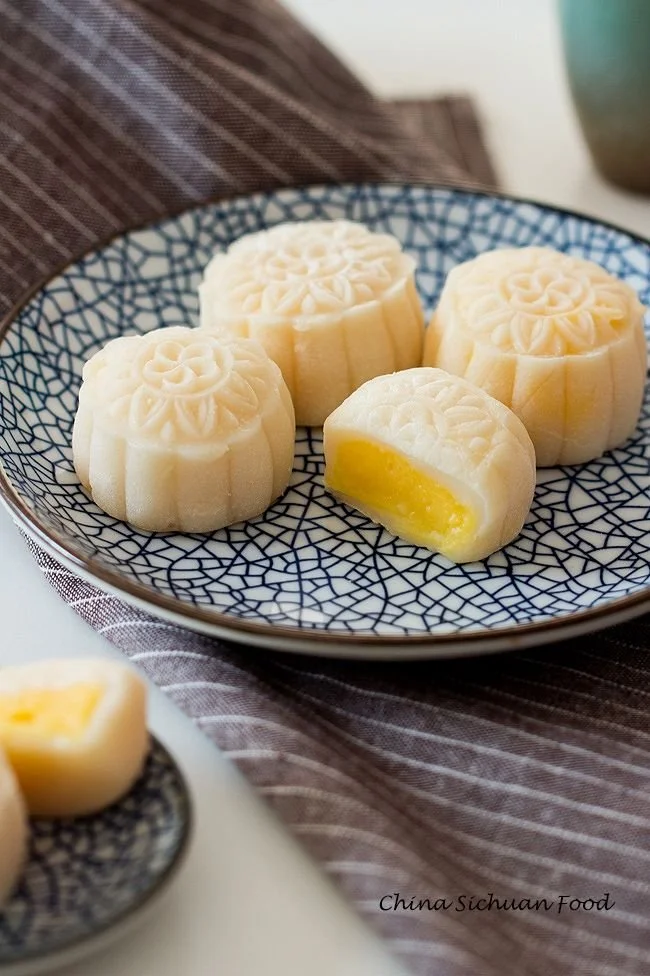
The original snow skin mooncake has a white, chewy outer layer like mochi and is served cold, which is why it's called "snow skin." Today, they come in colorful versions that look even better. Fillings include red bean, lotus, black sesame pastes, and the popular custard filling I’m sharing today.
Equipment required
Mooncake molds
Kitchen Gloves
Ingredients:
For the Filling
Here are what you’ll need to make custard filling
Wheat starch, or cornstarch/tapioca starch
Powdered sugar (aka icing sugar)
Condensed milk (or milk powder)
Unsalted butter, melted
Eggs
Cooking steps
Mix all the ingredients above until they’re fully incorporated. Pour the mixture into a saucepan.
Cook it over low heat. The mixture will start solidifying at the bottom of the pan. Keep stirring and folding with a flexible spatula to avoid burning.
Once it turns into a solid mass, transfer it to a bowl. Put cling film tightly over the cooked filling. Once completely cool, refrigerate it for 2 hours to firm up further.
Pro tips:
Remember to keep the heat very low. Do not boil. Otherwise, the filling will become lumpy.
Do not overcook. The filling should hold in shape but not too dry (It’ll become harder once chilled). For the desired consistency, please refer to the video in the recipe card below.
Other filling options
Many common sweet fillings for Chinese treats can go into snow skin mooncakes. I’ve written a post on how to make red bean paste. Also, you can find instructions on homemade lotus seed paste in my recipe for Cantonese Mooncake with Salted Egg Yolk, and black sesame paste (黑芝麻馅) commonly used in Glutinous Rice Balls.
Prepare the Skin
The outer part of snow skin mooncakes has a chewy, sticky and springy mouthfeel which I find very pleasant. It’s similar to the texture of mochi but a bit firmer, as it needs to be pressed to a particular shape and pattern.
Whatever it is, the way you tell your story online can make all the difference.
Ingredients for the skin
You’ll need the following to make the dough:
Glutinous rice flour (糯米粉)
Regular rice flour (粘米粉)
Wheat starch (澄粉), or cornstarch/tapioca starch
Powdered sugar (aka icing sugar )
Milk (full-fat or semi-skimmed)
Condensed milk
Neutral cooking oil (e.g. canola, vegetable, rapeseed, sunflower, etc.)
Pro tips:
Don’t omit regular rice flour: Some recipes suggest that you use only glutinous rice flour. I don’t suggest you skip regular rice flour. As I explained in my post on Sichuan Leaf-wrapped Rice Cakes, it helps the dough to stay in shape and to avoid it being overly sticky.
For a gluten-free diet: use cornstarch or tapioca starch instead of wheat starch which usually contains a very small amount of gluten (Unless your wheat starch is clearly labeled as gluten-free). They produce almost an identical result.
Cooking steps
1. In a mixing bowl, whisk all the ingredients for the skin until well combined. Pour the mixture into a deep plate.
2. To cook it, you have two options. Both work well. After cooking, the batter should turn completely solid (The time required may vary a little depending on your device. Adjust if necessary).
OPTION 1: Microwave – Cover with a plate to avoid splashing. Cook on high power for 4 minutes.
OPTION 2: Steam – Cover with a plate to avoid dripping water. Steam over medium-high heat for 20 mins
3. With a flexible spatula, scrape the hardened dough off the plate. Transfer it to another plate to cool quickly.
4. Once no longer hot to touch, combine and knead it with gloved hands until it becomes smooth and elastic.
Pro tips:
Knead the dough very well. This helps to reduce stickiness.
Cover the kneaded dough tightly with cling film. To make assembly easier, chill it in the fridge for 1 hour.
If you double the quantity of the recipe, microwave the mixture in two batches. If steaming, increase the time to 30 minutes.
Cooking steps
Mix all the ingredients above until they’re fully incorporated. Pour the mixture into a saucepan.
Cook it over low heat. The mixture will start solidifying at the bottom of the pan. Keep stirring and folding with a flexible spatula to avoid burning.
Once it turns into a solid mass, transfer it to a bowl. Put cling film tightly over the cooked filling. Once completely cool, refrigerate it for 2 hours to firm up further.
Pro tips:
Remember to keep the heat very low. Do not boil. Otherwise, the filling will become lumpy.
Do not overcook. The filling should hold in shape but not too dry (It’ll become harder once chilled). For the desired consistency, please refer to the video in the recipe card below.
Other filling options
Many common sweet fillings for Chinese treats can go into snow skin mooncakes. I’ve written a post on how to make red bean paste. Also, you can find instructions on homemade lotus seed paste in my recipe for Cantonese Mooncake
Shape the Mooncakes
Before assembly, make sure the dough and the filling have been chilled so they are reasonably firm to touch. This way, they are much easier to handle.
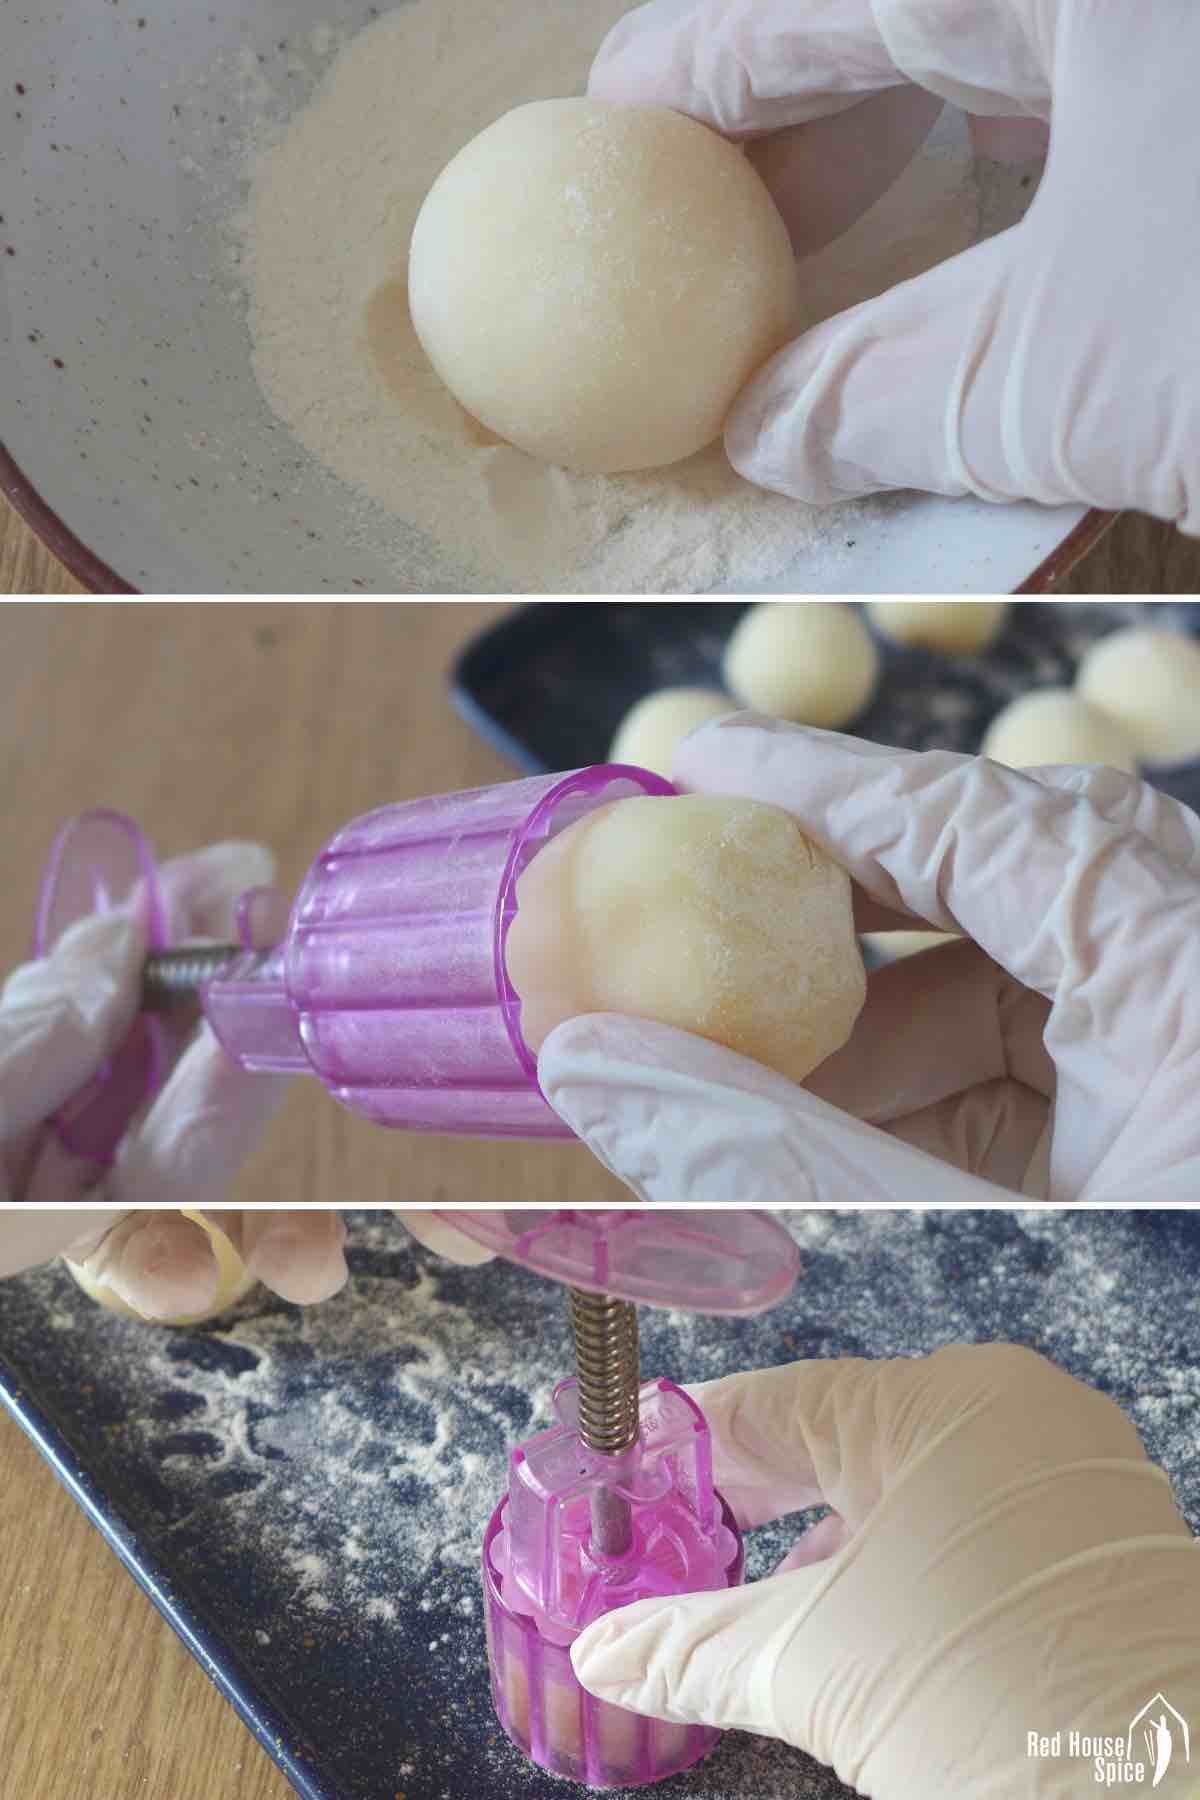
To prevent the mooncakes from sticking to the mold, you also need a little dusting flour. You can make it by toasting some glutinous rice flour over low heat for about 4 minutes. Leave to cool for later use.
To assemble the mooncakes, follow these steps:
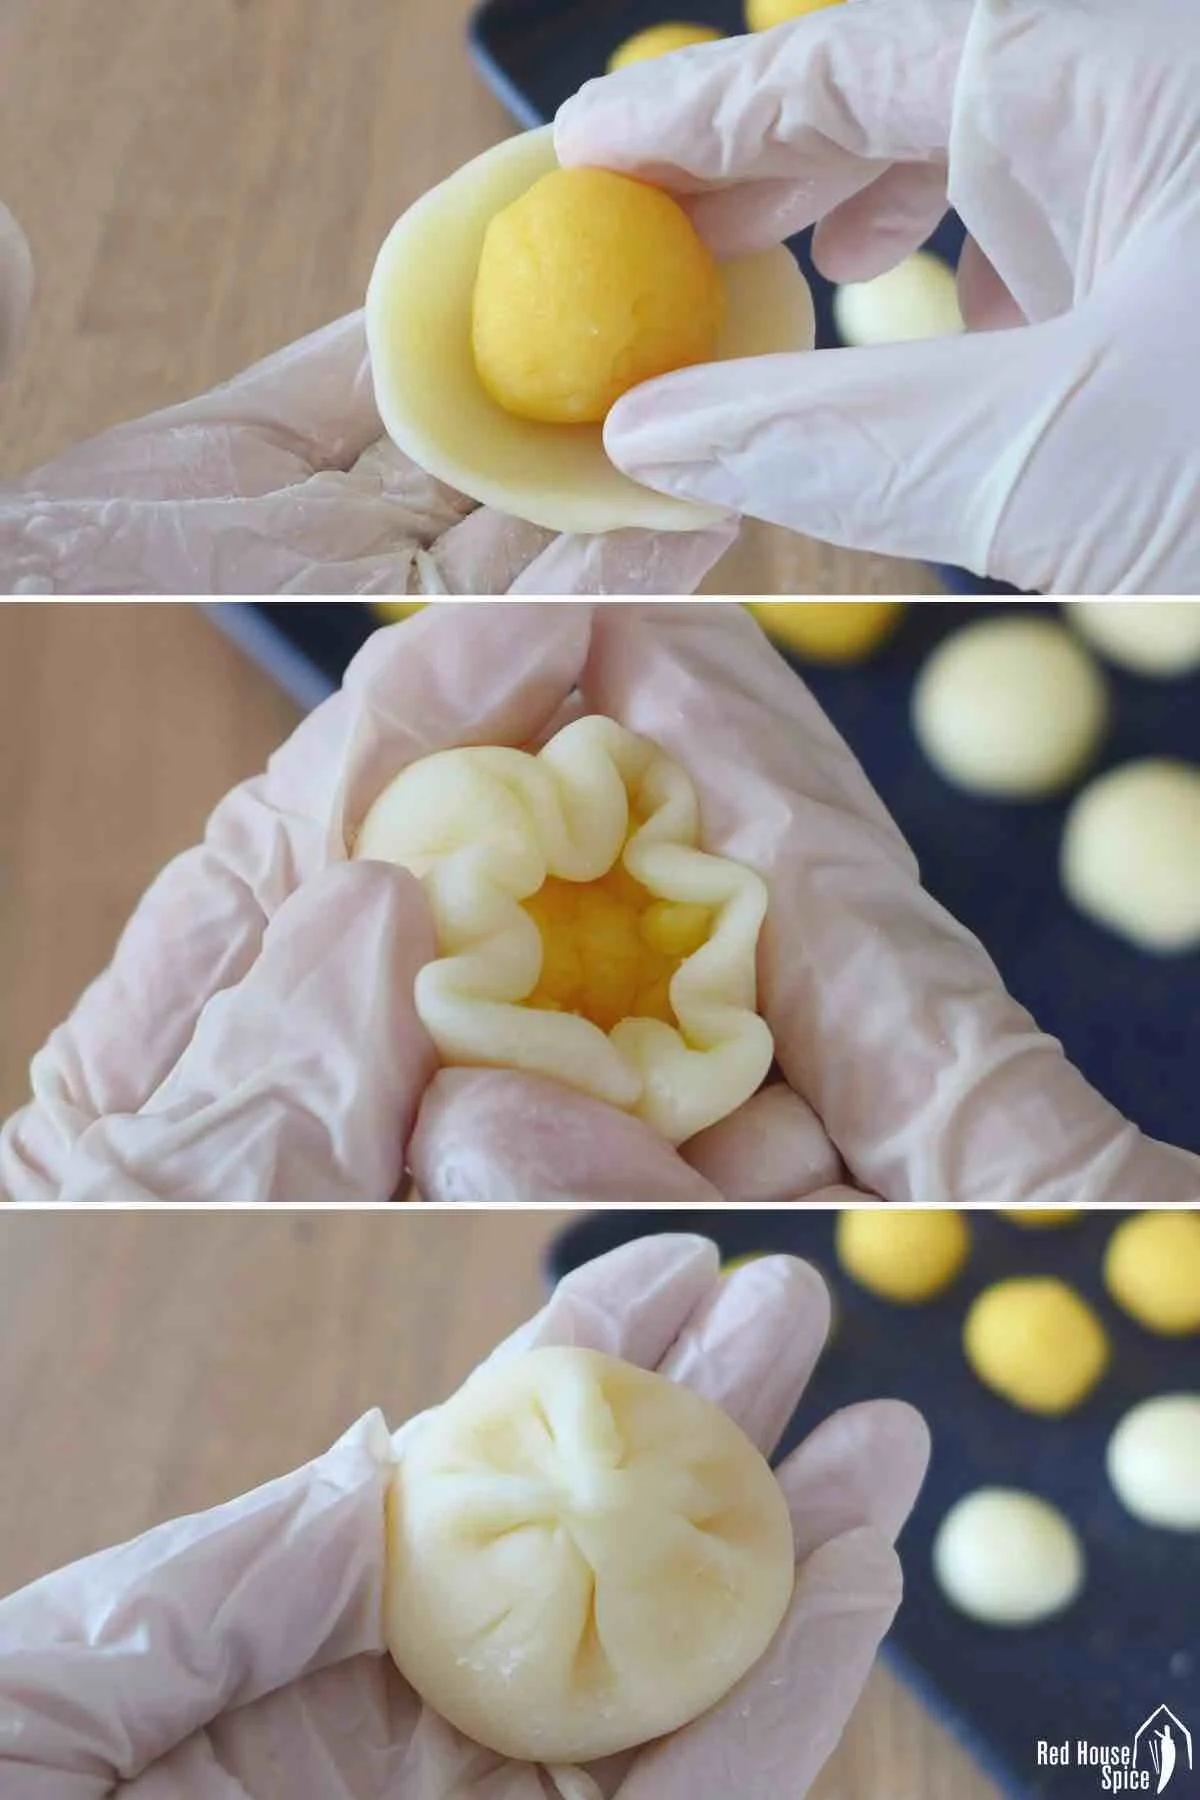
1. Divide the dough and filling into equal pieces (a kitchen scale helps). Roll each into a ball.
2. Flatten a piece of dough into a disc. Place a piece of filling in the middle.
3. Gently push the wrapper upwards to tightly cover the entire filling. Seal well on the top.
4. Roll the assembled ball in the toasted glutinous rice flour to gain a thin coating.
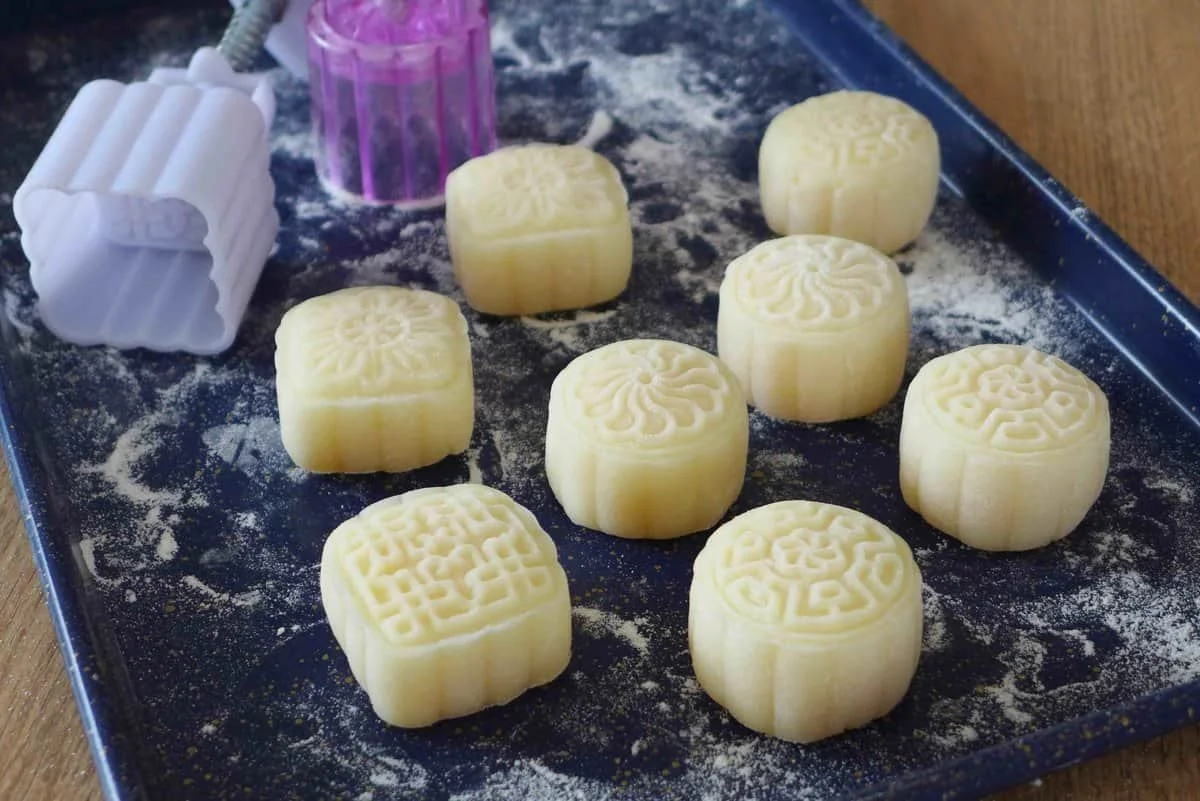
5. Put it into a mooncake mold. Place the mold on a flat, lightly dusted surface. Press the springy handle to shape the mooncake.
6. Lift the mold up. Press the handle again to push the mooncake onto the surface.
Pro tips:
Remember to wear gloves to avoid sticking.
If your mooncakes don’t come off the mold easily, lightly dust the mold beforehand.
If using a traditional mold, dust it well then put the ball in. Press to flatten. Tilt the mold while tapping it gently until the mooncake falls off.
Serve & store
Right after assembling, your mooncakes are ready to be served! Enjoy them as an afternoon snack or a dinner treat.
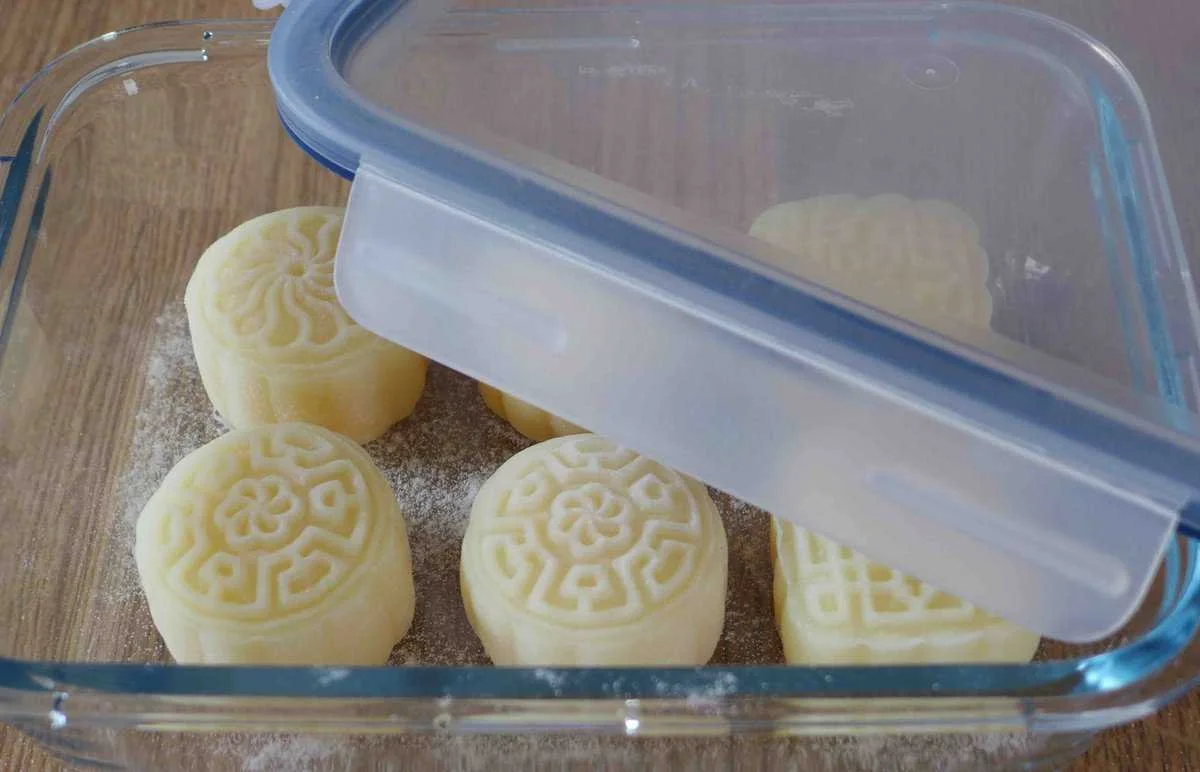
If you plan to eat them later, here is how you store them:
In the fridge: Place them in air-tight containers and consume within 72 hours. Make sure you add a layer of parchment paper between each layer if you have to stack them up.
In the freezer: Freeze them as soon as they’re assembled in air-tight containers/plastic bags for up to 1 month. Leave to thaw in the fridge.